Appearance
Creative Dashboard
AiX seamlessly integrates with your favorite media and measurement platforms to streamline creative analysis.
AiX's customized label system allows you to identify key elements that affect the success of your creative, like characters, colors, sounds, text, and more. Armed with a full report, you can produce creative assets that resonate each and every time.

Filter and search data
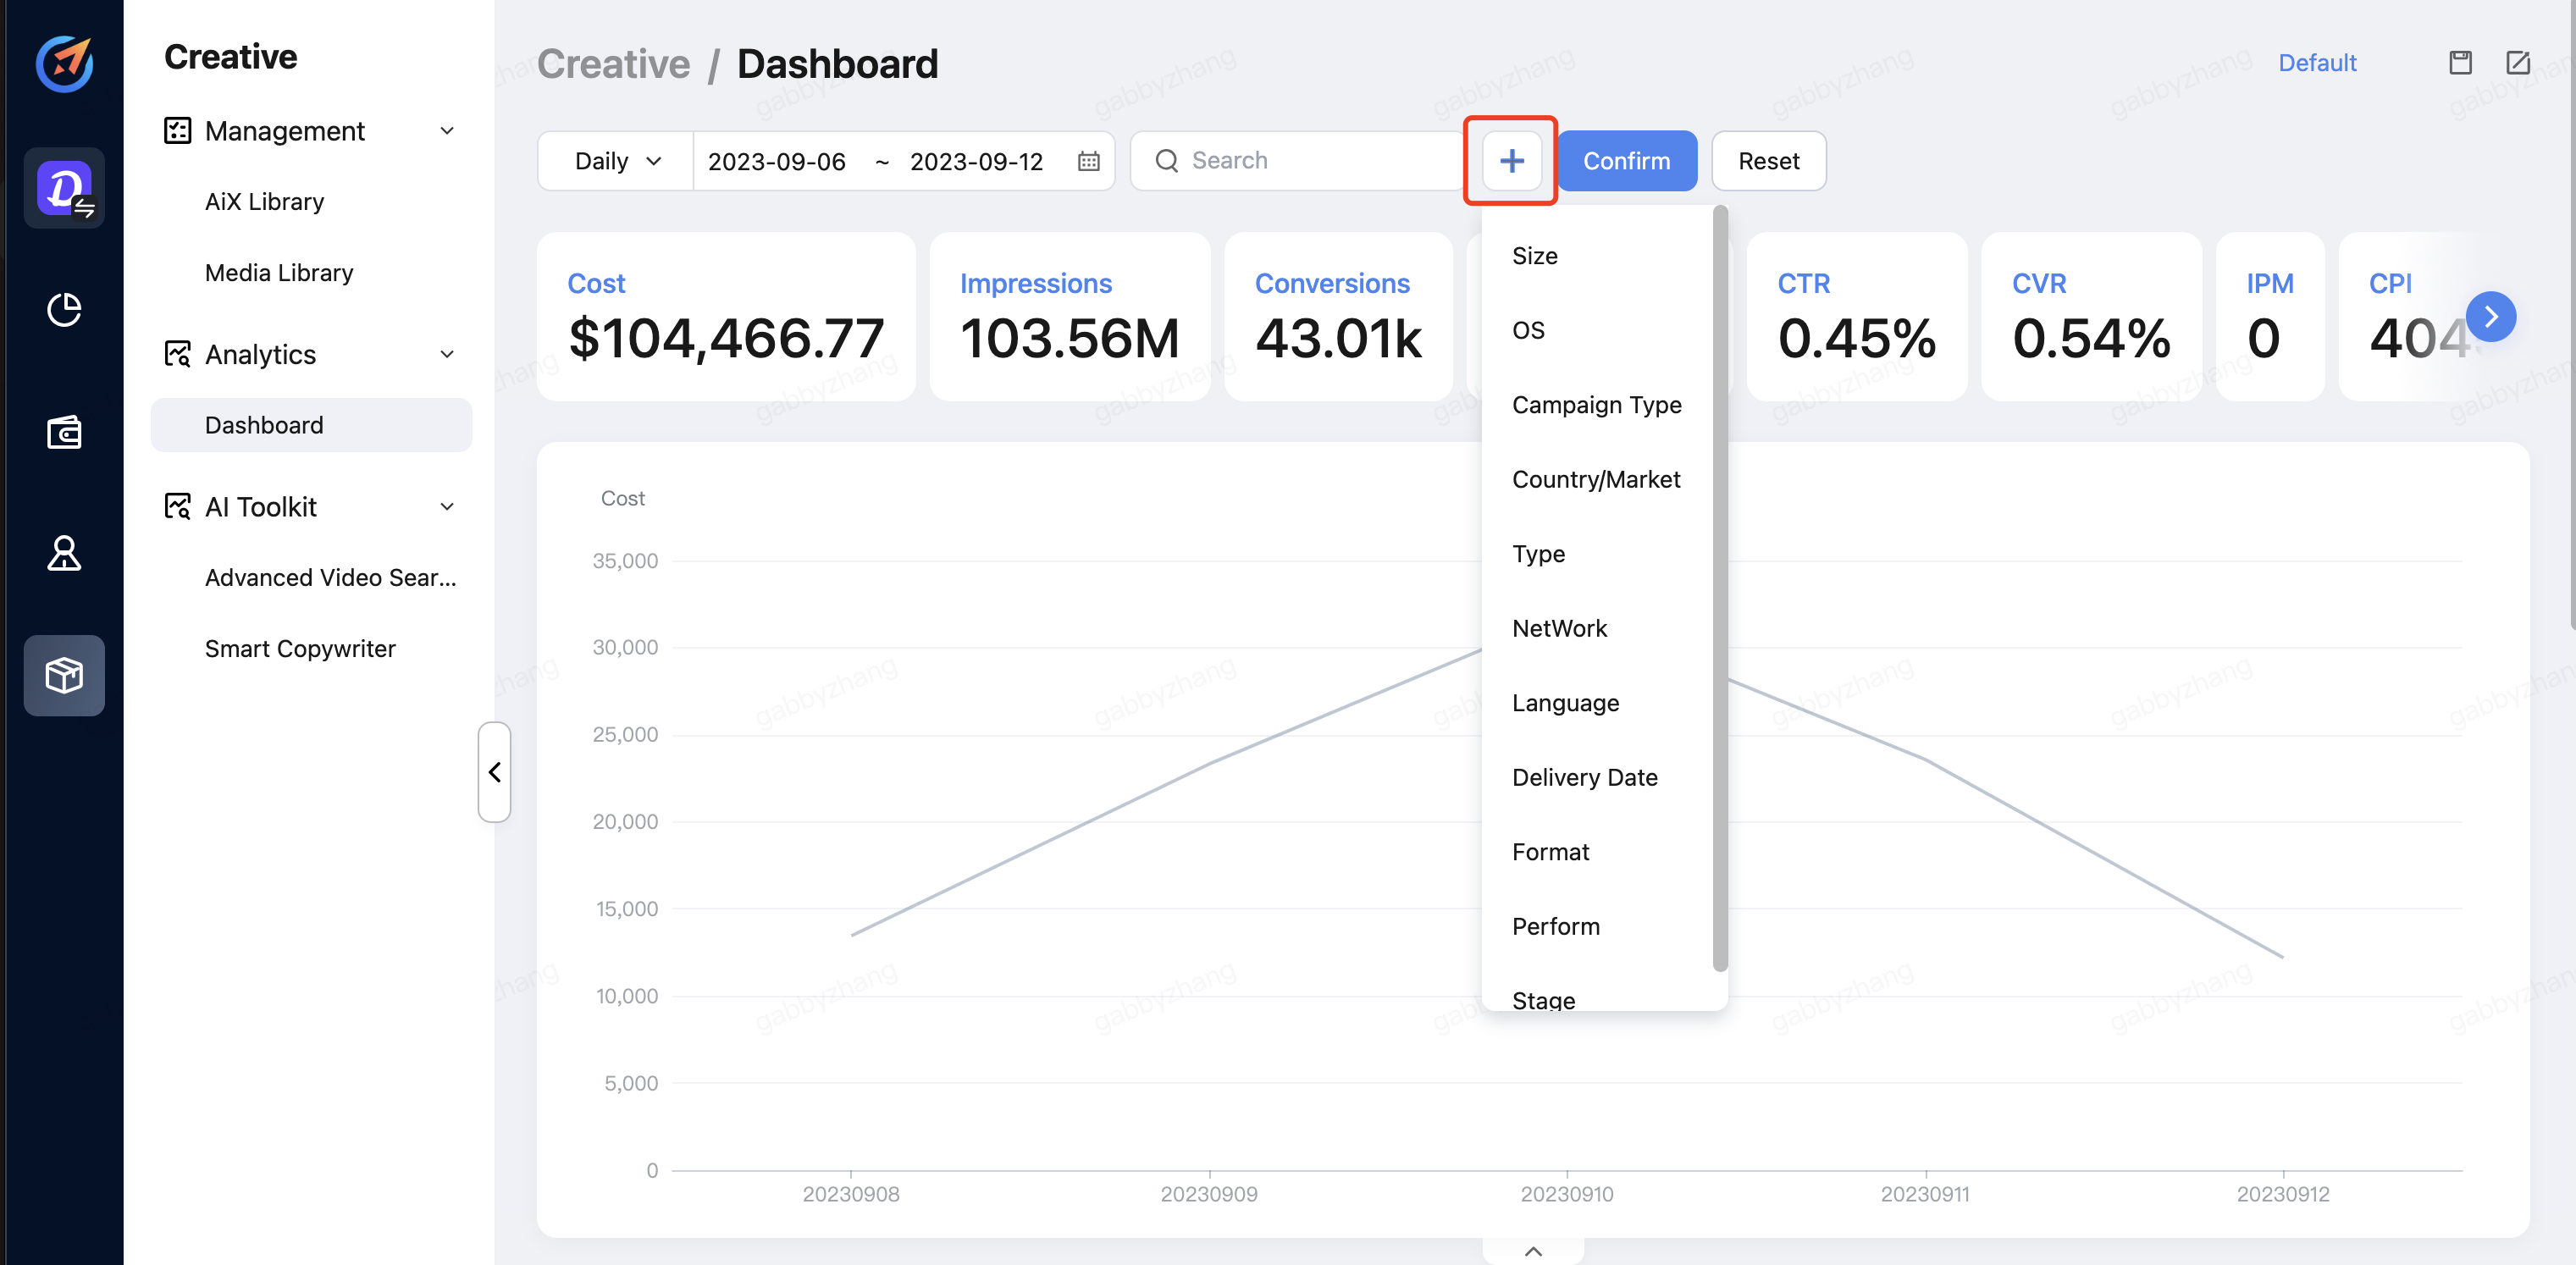
At the top of the creative dashboard, you will see a date filter and a search bar by default. You can add more filters by clicking the + (plus) icon.
Group by and breakdown data
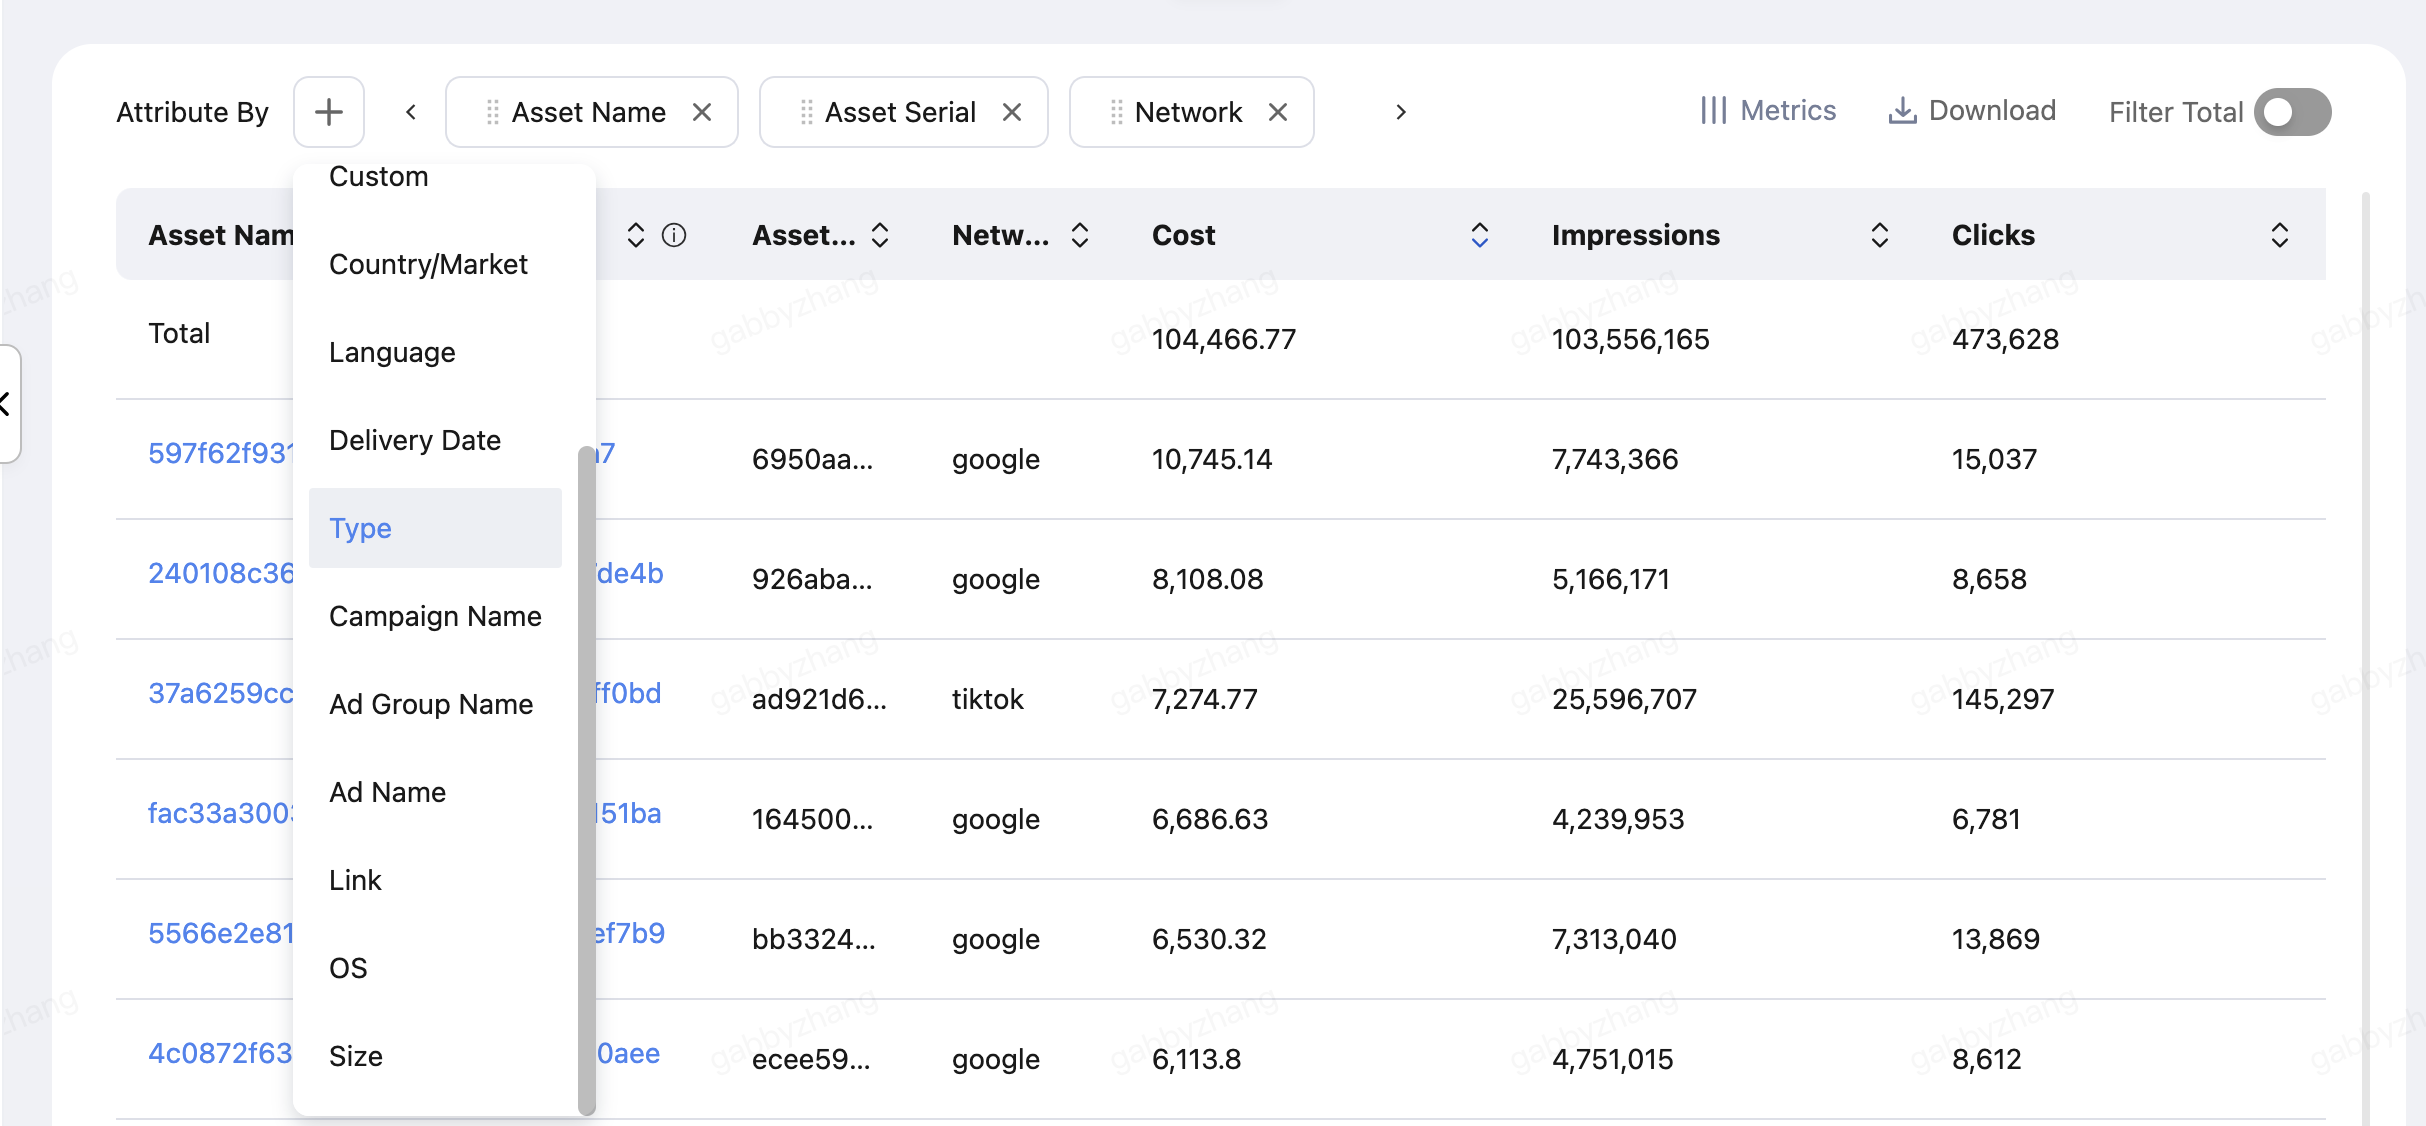
By default, the dashboard would display data by asset name. To view data with different dimensions, you can click the + (plus) icon next to Attribute By, and select the desired dimensions.
Long-press these doted areas on each attribute, then drag them left and right to change the sequence of your selected data dimensions.
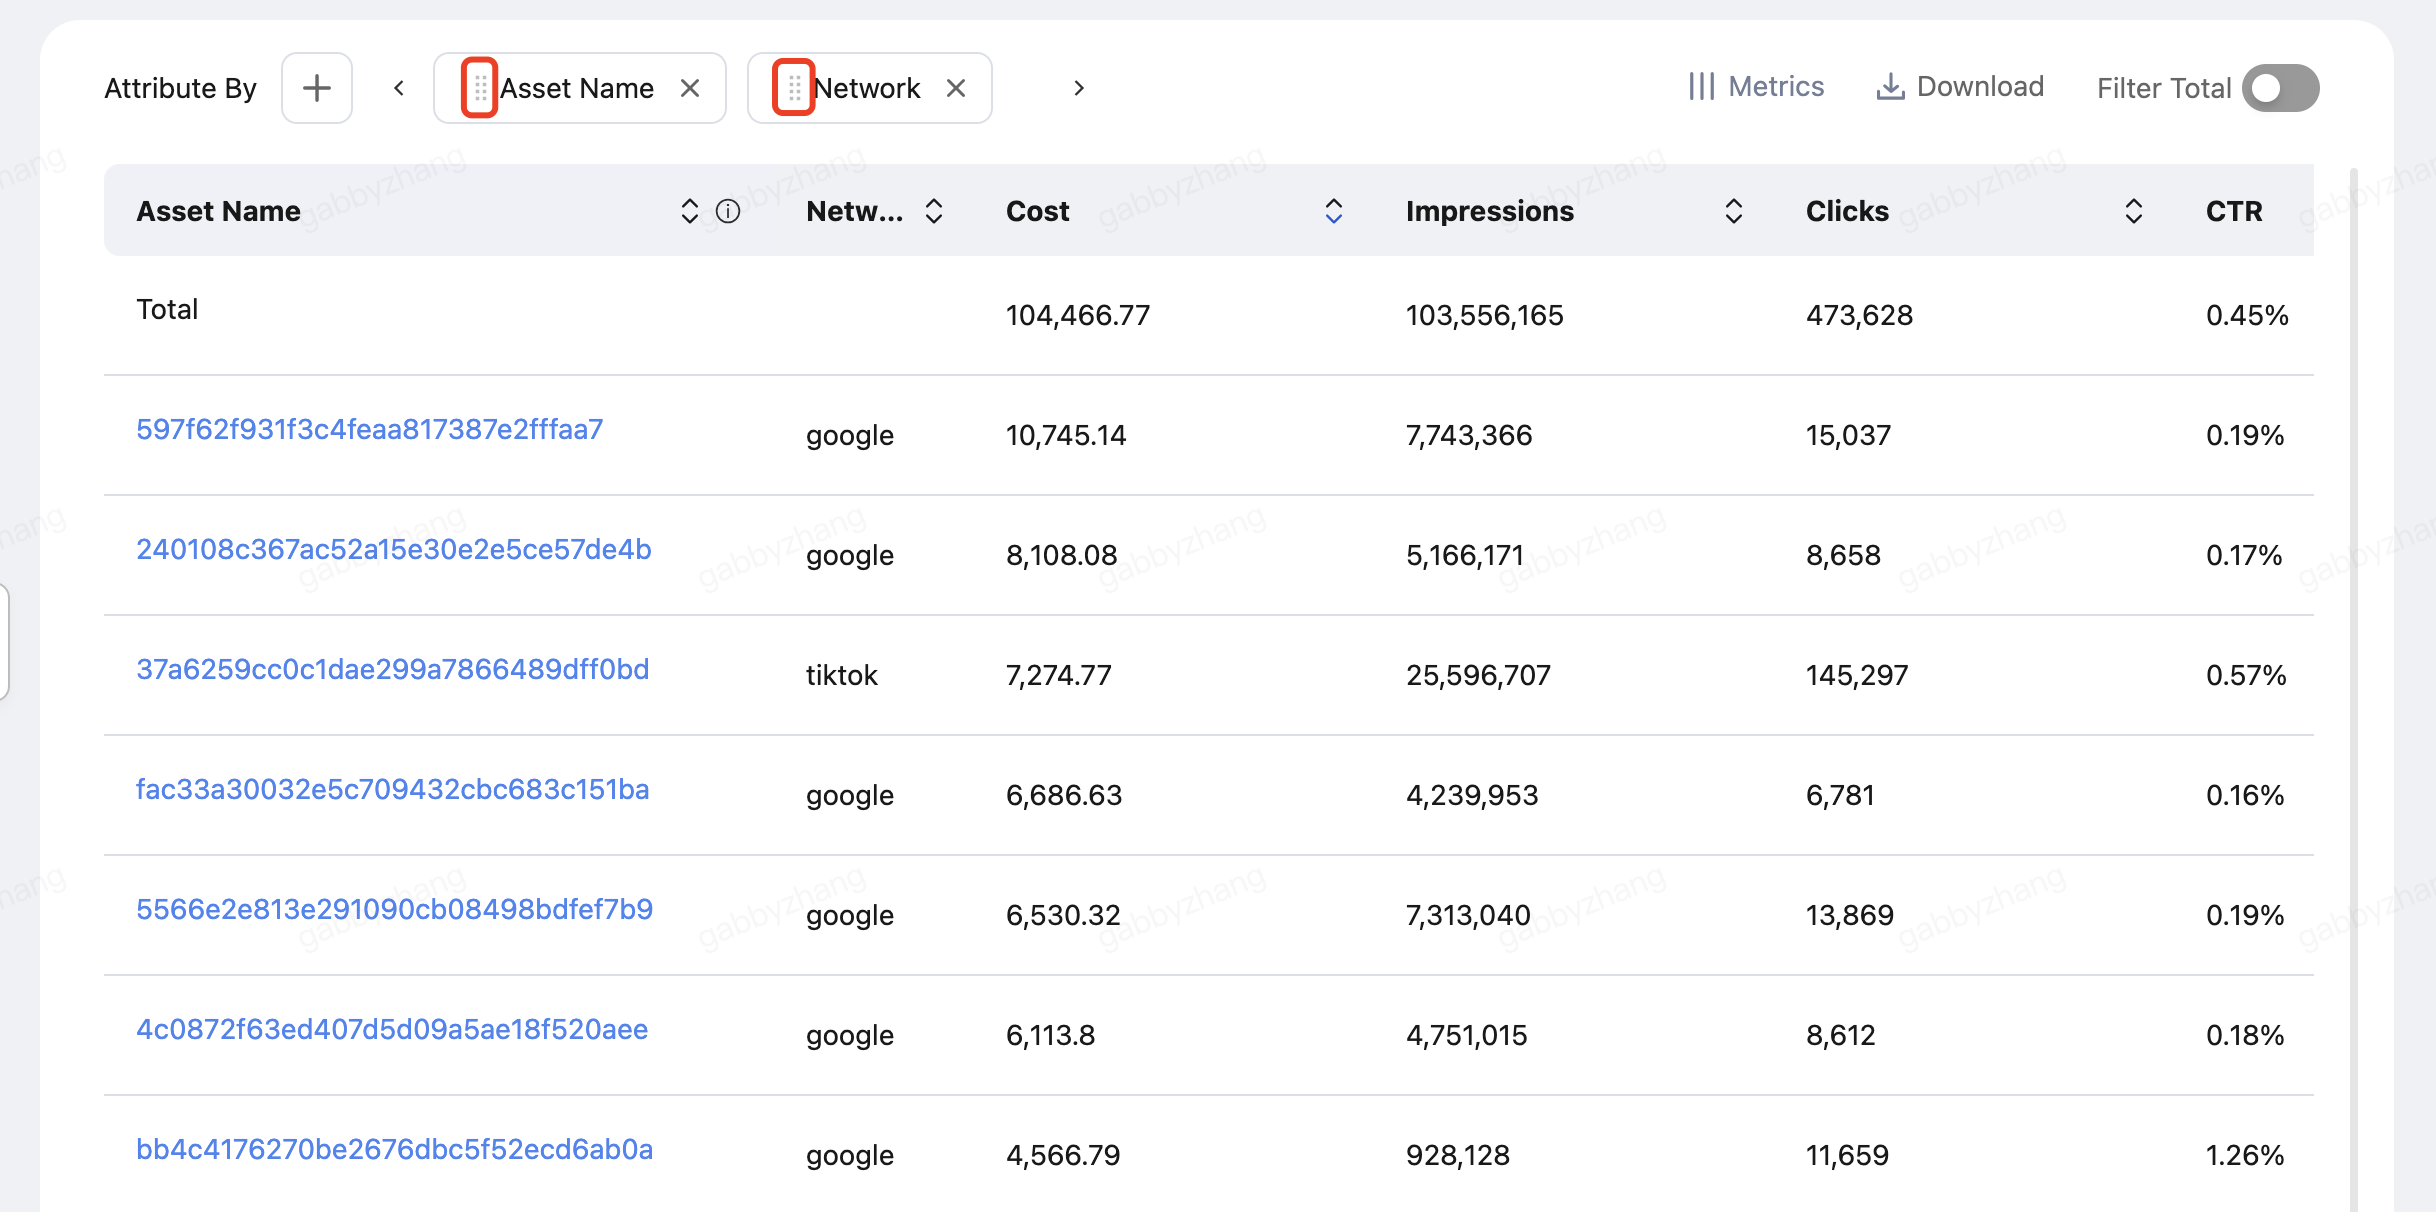

If you choose to view data with more than one attribute, then, in that case, we would calculate the sum of each dimension and display it by default for your convenience.
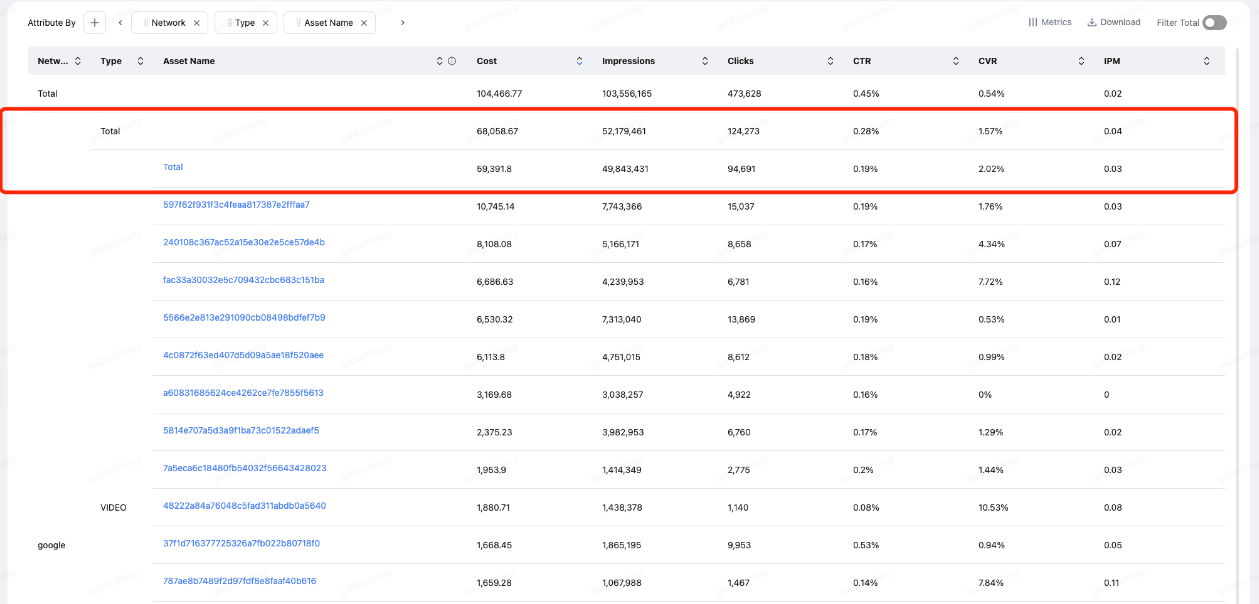
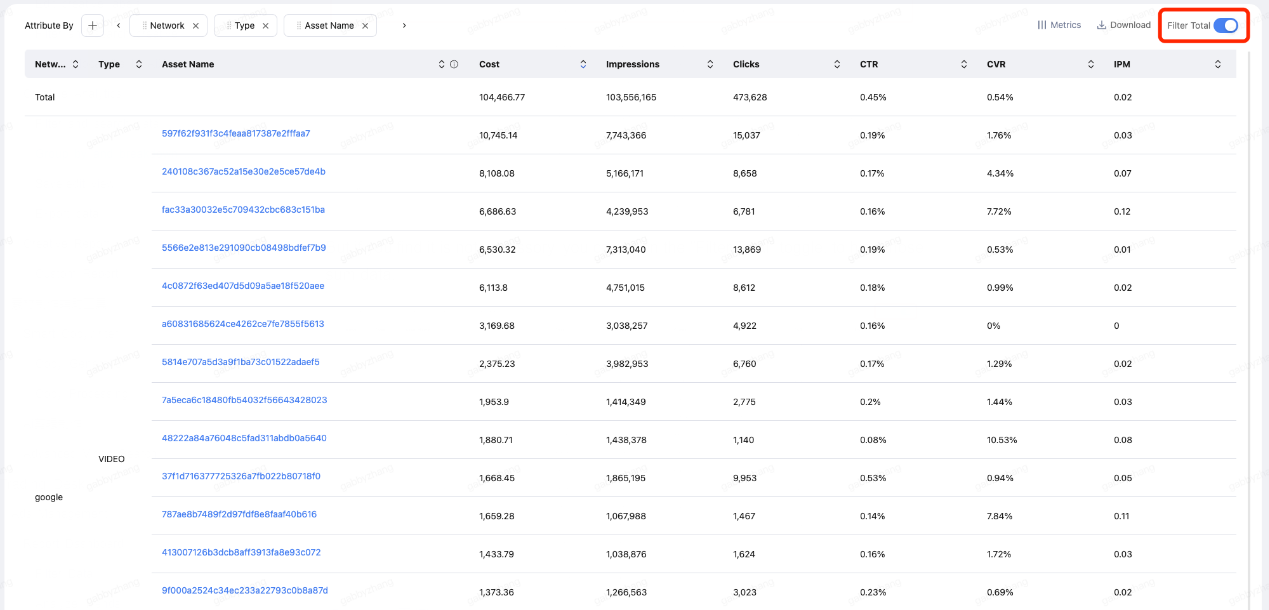
If you find it not necessary, you can toggle on Filter Total to hide those sums.
Save/edit view
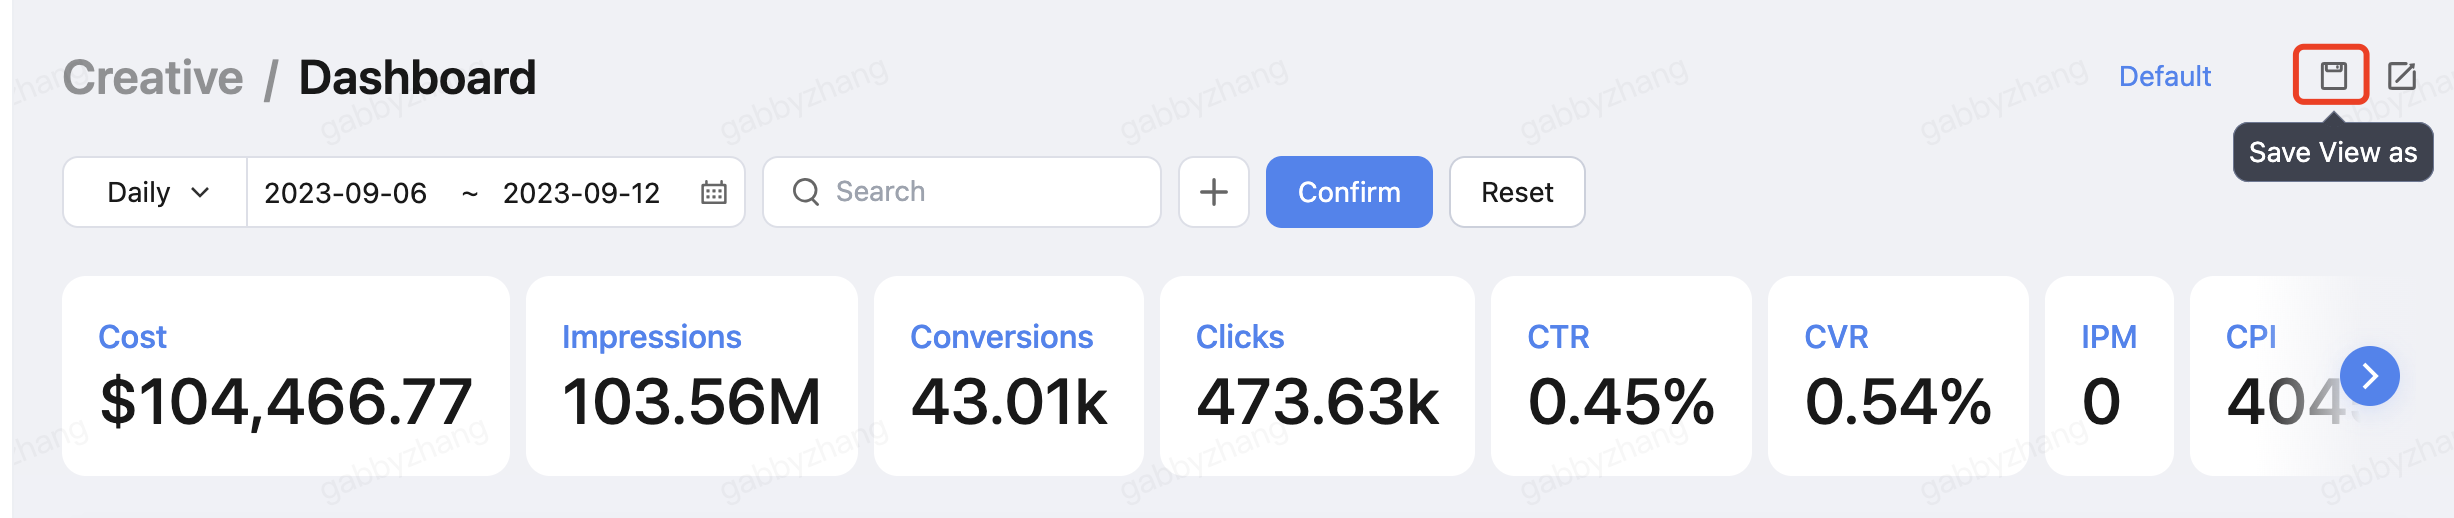
To save the current filters and attribute settings into a view, click the save icon in the top right corner.
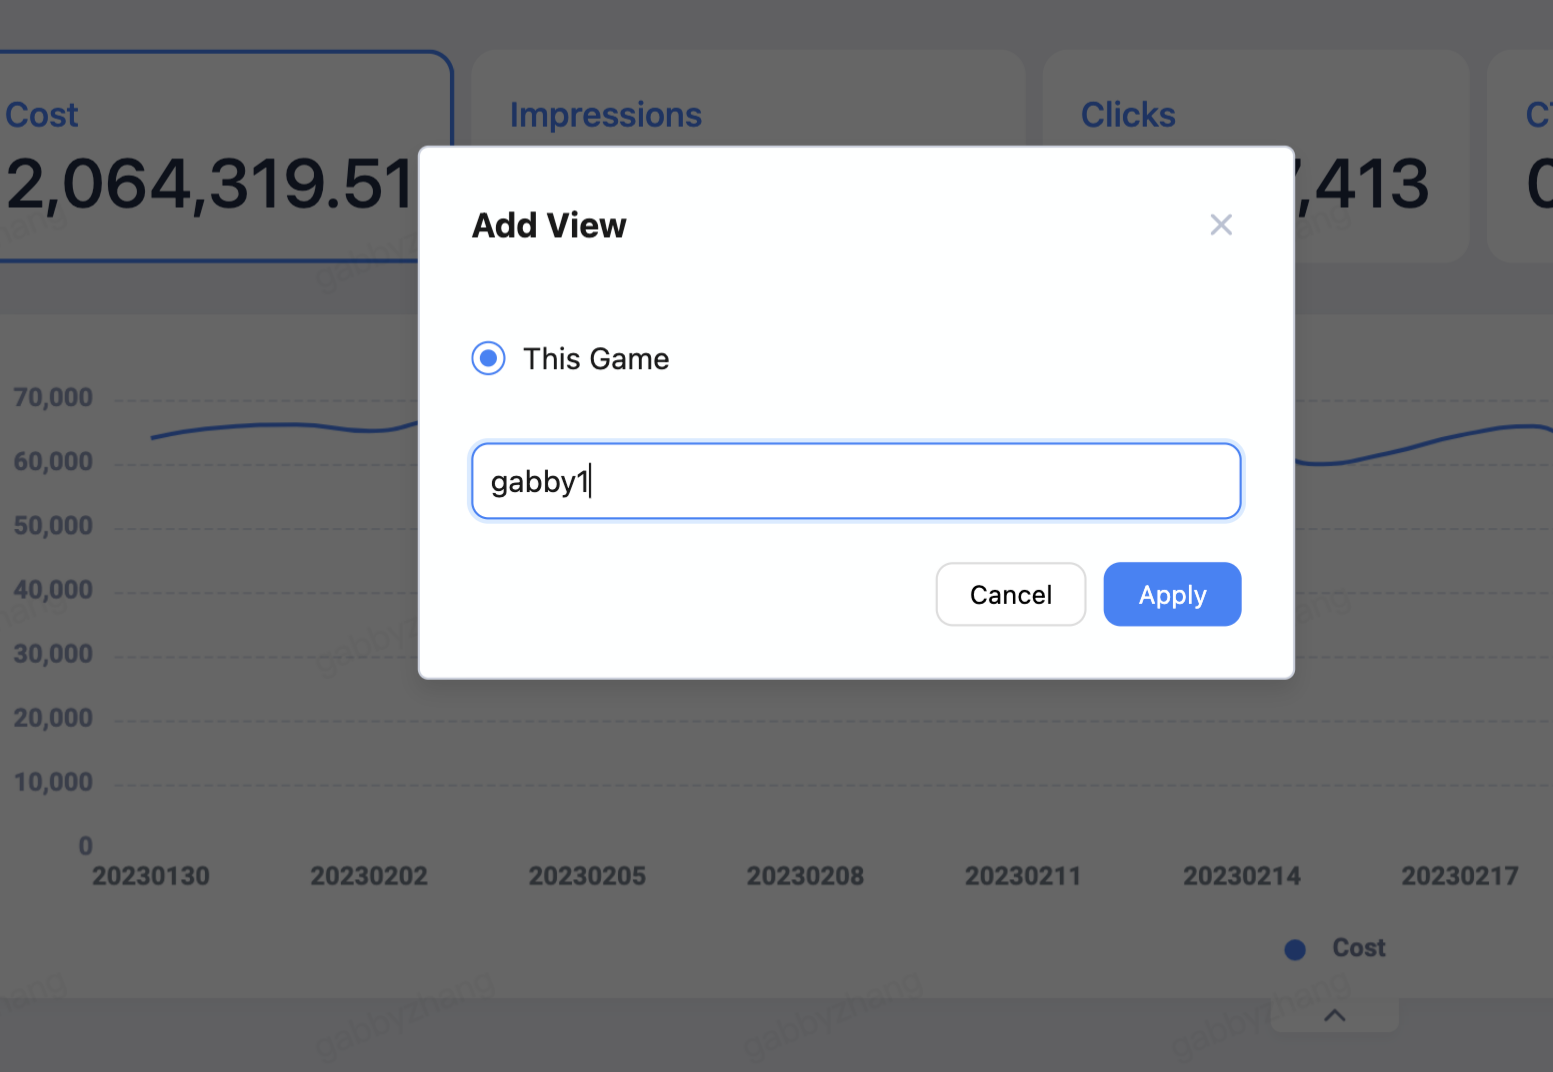
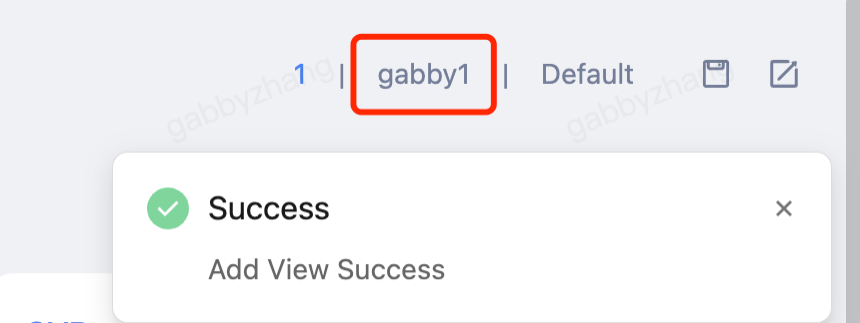
Name your view and click Apply to save it.
All your saved views are displayed in the top right corner next to the save icon. You can switch to different views at anytime.
Export data
To export a data file, select Download > Download > Export CSV/Export XLSX, and then AiX will estimate the size of the data file according to the time range and attributes you selected.

If the size of the data file is within the limitation for AiX to process immediately, then the data file will be exported to your selected format.
If the size of the data file is too large to be exported immediately. For example, the export task failed to load or it took too long to download.
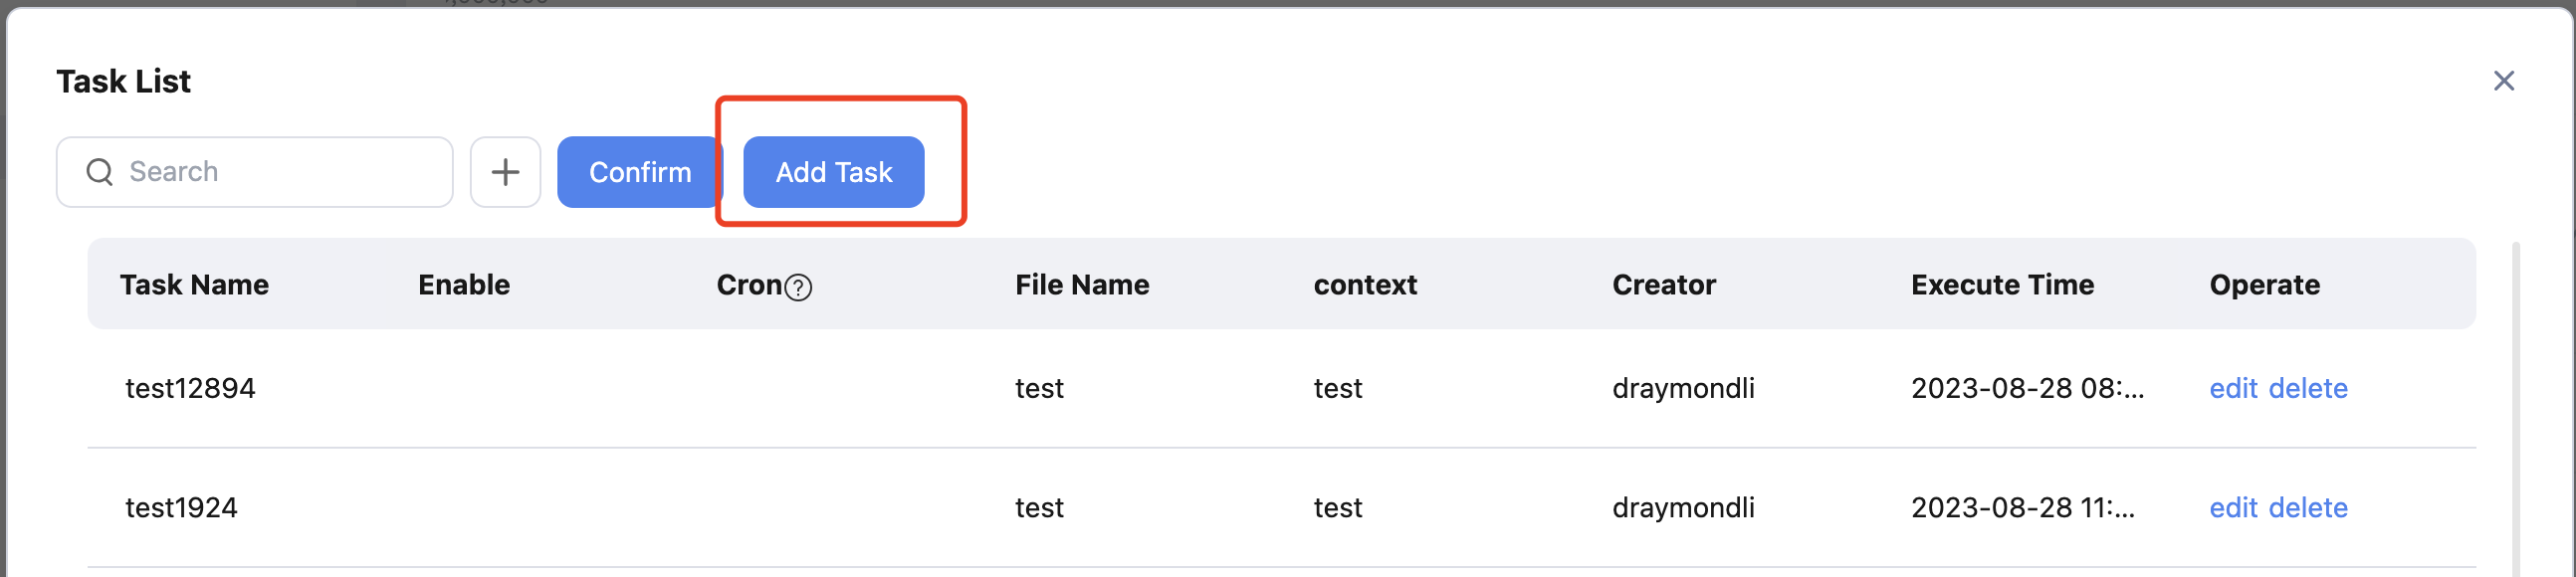
Select Download > Schedule, and click Add Task in the popup.
Edit necessary information, such as email subject, body, and data file name, in the popup, and click Confirm.
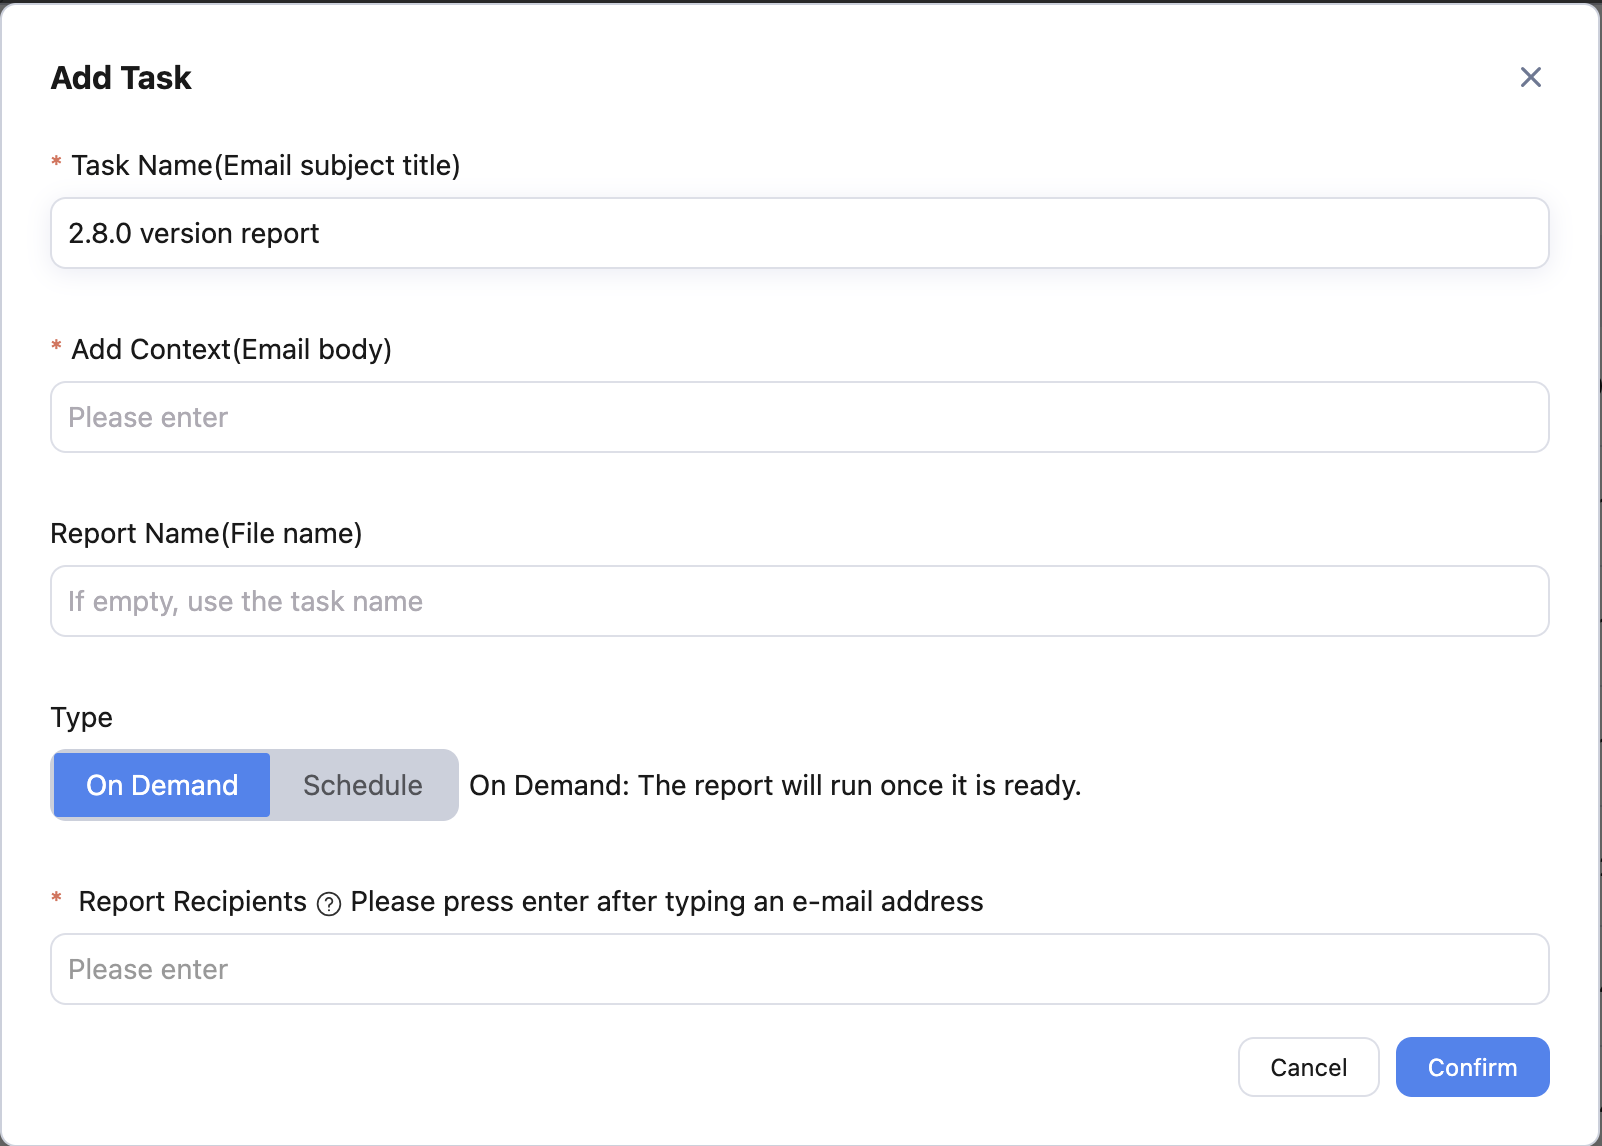
TIP
You need to press the Enter key after typing an email address! The email address that has been successfully added will turn from normal text to a removable option with a grey background.

Depending on the file size, recipients added to the task should receive an email with the data file attached in 5 to 10 seconds.